Here's how to do this cute and easy cheetah print nail art! All products used will be at the end of the tutorial. Enjoy! :)

Apply your base color. This will be the background color in the cheetah print. I'm using Essie "Mint Candy Apple". This color is a pretty light blue. It takes me 3 coats to get it fully opaque. Different colors and brands will vary in coat 'usage'. The next step is to find a separate piece of plastic or paper to put nail polish onto. I like to use a paint palette when I do my nails, but i used paper for this tutorial. This color will be the spot in the cheetah print, here I'm using white. If you choose to do colorful cheetah print, it looks best when you have two different colors for the base and cheetah spot, but keep the outside brackets black or white. If you do three different bight colors for the spots, it tends to look sloppy.
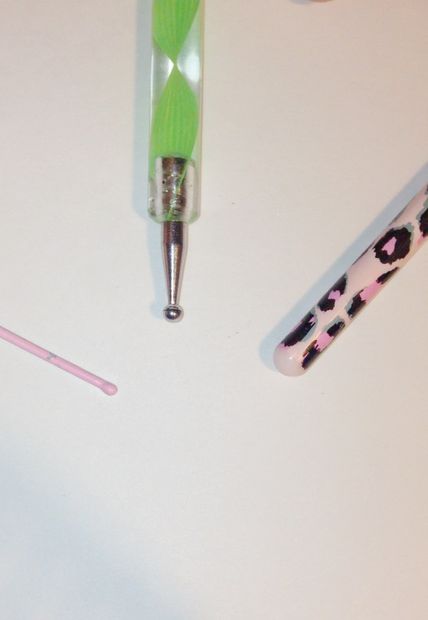
To achieve cheetah print, you will need some type of dotting tool. A dotting tools can help you create perfect dots. Even if you don't have a dotting tool, there are different substitutes. Two good ways are the back of a paint or makeup brush and the end of a bobby-pin. If you are looking for dotting tools i will include a link to where i bought mine. I found them on Amazon. You also look on Ebay or your local beauty store. http://www.amazon.com/2-ways-Acrylic-Design-Dotting-Painting/dp/B005Y6F4WO/ref=sr_1_2?s=beauty&ie=UTF8&qid=1390962624&sr=1-2&keywords=dotting+tools
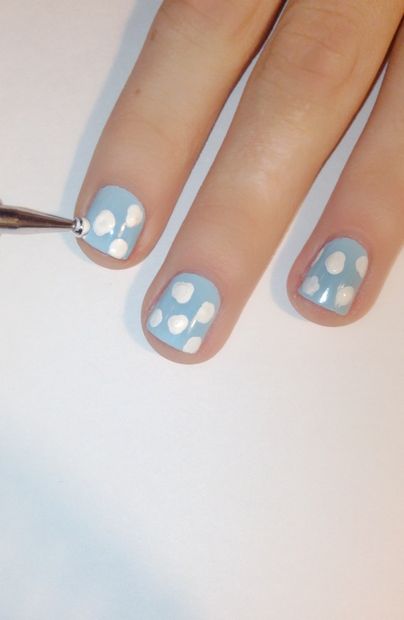
This next step is easier than it looks. You don't need to have perfect spots, it looks better when they're different. Dip the dotting tool into the polish you are using, and place it on the nail and a circular stippling motion. I looks best when the dots come out looking like little clouds.
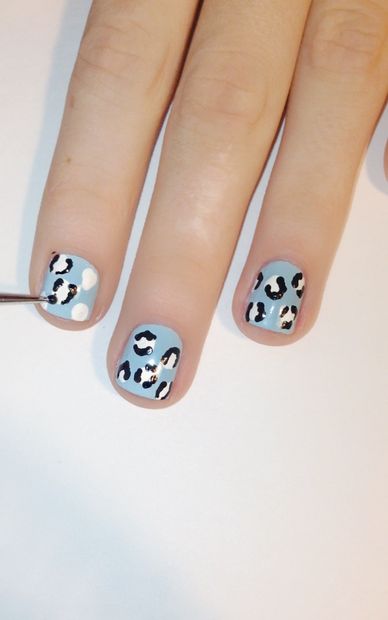
Take the bracket color and place it on a piece of paper. Find a dotting tool that is smaller than the one you used for the spots. A toothpick works as well. This step is also easier than it looks. Take the dotting tool and dip it into the color you are using. Then make little C-shaped brackets in group of 1,2, and 3. It's okay if it looks a little messy, they don't need to look exactly the same. :) Then take the same sized dotting tool or toothpick and add little dots between the spots to fill in the spaces.
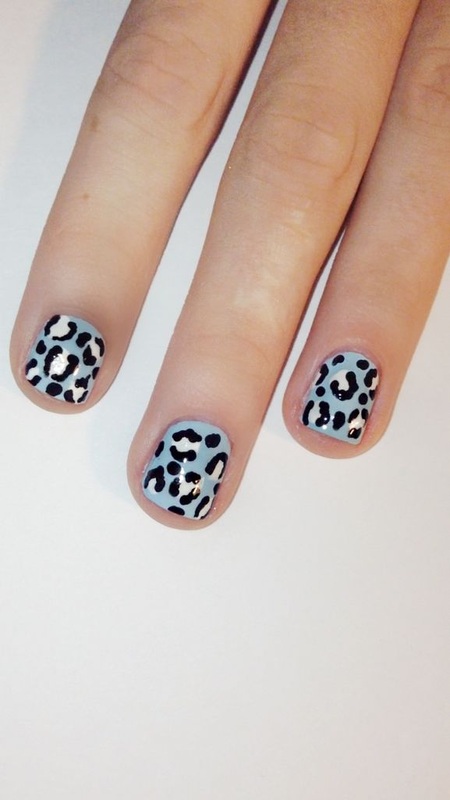
Add a fast drying top coat to prevent chipping, smooth out any bumps, and add a shine! My all-time favorite top coat is Seche Vite- fast drying top coat. It dries in under 5 minutes and smooths everything out; not to mention it makes my nails look shiny.
Products Used:
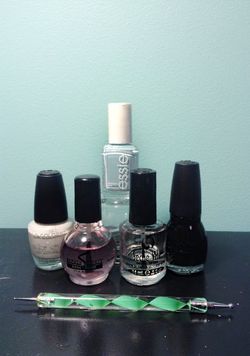
Base Coat: Beauty Secrets "Base Coat"
White: L.A. Colors "White"
Blue: Essie "Mint Candy Apple"
Black: Sinful Colors "Black On Black"
Top Coat: Seche Vite "Fast Drying Top Coat"
Dotting Tool: http://www.amazon.com/2-ways-Acrylic-Design-Dotting-Painting/dp/B005Y6F4WO/ref=sr_1_2?ie=UTF8&qid=1390964403&sr=8-2&keywords=dotting+tools
White: L.A. Colors "White"
Blue: Essie "Mint Candy Apple"
Black: Sinful Colors "Black On Black"
Top Coat: Seche Vite "Fast Drying Top Coat"
Dotting Tool: http://www.amazon.com/2-ways-Acrylic-Design-Dotting-Painting/dp/B005Y6F4WO/ref=sr_1_2?ie=UTF8&qid=1390964403&sr=8-2&keywords=dotting+tools